Tuesday, September 29, 2015

Bridal Makeup Tips

Hey Guys!
I'm so sorry I have been MIA for a few weeks now, my life has been crazy busy so please forgive me!!

So.. this summer I have been super busy with doing makeup for weddings, proms, and other special occasions, so I wanted to share some tips  and tricks with you because I realize not everyone can afford to get their makeup professionally done on their big day.. (but if you can afford it give me a call!! ;)) 

1. Do not use any 'new' products- make sure you test out any new products before that day.. the last thing you need is a break out on the day you've been dreaming of since you were 5!

2. Apply makeup to a clean moisturized face- you want to start with a fresh face and being moisturized will help your makeup lay better.

3. Always start with your eyes- I always follow this rule when I am doing makeup for a special occasion because if you do your eyes last you can mess up the rest of your makeup, then you'll have to start all over and we don't have time for that!

4. PRIME AND SET!- this is very important when you want your makeup to last all night and through those happy tears. Prime your eyes AND your face. Always set your makeup with a setting spray, it should be the last thing you do and trust me it's important! I love using the Urban Decay All Nighter Setting Spray.

5. No SPF- make sure your primer and foundation DO NOT have any SPF in it.. you are going to have your picture taken like a million times and if you have SPF on, the flash back from cameras will make your face look white.

6. Remember.. You are not clubbing- when doing your eye makeup keep in mind that you are not partying, you want a timeless/glamorous look you wont be embarrassed of in 10 years. The only exception to this rule is unless a dark smokey eye is your thing  (like one of my favorite brides, Megan.. her smokey eye I did was BEAUTIFUL).


7. Foundation- make sure if you are getting new foundation just for this day make sure to match the color your neck will be. Some people tan for their wedding or even spray tan, so make sure your foundation will match that, also if you are getting new foundation make sure to try it out a few weeks before the big day. Last but not least, make sure to drag the foundation down your neck and onto your ears to make sure their are no harsh lines.

8. Always do a trial run- even if you are doing your makeup yourself, try it out a few times.. (practice makes perfect!) You could think you want a particular look but when you see yourself with it, you could hate it. Try different things out, you have time now to change your mind.. You probably wont on the big day!

9. BLEND- make sure all of your harsh lines are blended out seamlessly on your eyes and your face. Just basically blend everything until your hands want to fall off!

10. Don't be afraid to try new things- I know some makeup application can be scary like contouring, filling in your brows or even wearing false lashes. Like I said in number 8 do a trial run so you can try new things out, you might end up loving it!

Good luck to all the brides and anyone who just has a special occasion! I hope this helps those of you doing your own make up and as always if you have any questions or would like to book me to do your makeup please feel free to comment or send me a message!

xoxo
Magg

Monday, August 3, 2015

July Favorites- 2015

Hey Guys!
I cannot believe it is already August! I have a few products to share with you that I loved in the month of July!

First product is new, it just came out in July and its the Becca x Jaclyn Hill Shimmering Skin Perfector in Champagne Pop, I was skeptical about this, at first I figured everyone loved it just because Jaclyn Hill created it, but I really love this product.. not just the name on it. I used my friend's first before I even ordered it for myself. It makes my skin look so luminous and I think it will look amazing on any skin tone.

This is the Tartelette Amazonian Clay Matte Eyeshadow Palette.. which I think is really weird for me to love in the summer because normally I wear mostly shimmer shadows this time of year, but I can't put this palette down. It is great for so many looks, the pigmentation is awesome, and the colors are gorgeous! I just love it!

Next is an oldie but goodie! This is the L'Oreal Telescopic 2X Mascara. I used this mascara EVERYDAY back in the day but I haven't used it in a while.. I grabbed it on accident one day and fell in love again. I forgot how much I loved this stuff! It such a great drugstore mascara, I even think it is better than some high end mascara!

In the summer I think everyone needs a glossy lip. I have been using the new e.l.f. essentials EX-tra lip glosses. They are just a really great basic gloss and for $2 you can't complain.. I like most of the colors, some have glitter in them and glittery lip gloss is not my thing, but the other ones without glitter are really great! You can put these over a lip stick or they are great on their own!

This stuff is my summer LOVE.. The Fake Bake Instant Spray (or mousse). This is the most natural looking self tan I have ever used. It is easy to apply and when it comes off it is a gradual process, not splotchy and it isn't orange at all, it just looks tan. This is a great self tanner!

This has been my favorite brush set since I got it. This is the 11 pc. Pink-A-Dot Brush Set from BH Cosmetics. I really like all of the brushes I get from BH, they don't shed and they do a really great job, they are also super cheap! I use most of these brushes when I apply my makeup.. Very good product for a great price!

Last but not least.. another BH Cosmetic product. The Forever Nude Sculpt and Glow Contouring Kit in light/ medium. This palette comes with an under eye setting powder, a highlighter, blush, a bronzer and a contour powder all in one! I have used this all month for just an everyday look. I use and love all of the powders that come with it. Another great product for an even better price!


These are all the favorites I had for July! Let me know what you have been loving so far this summer.. I like trying new products and hearing your opinions! If you have any ideas for posts this months leave me a comment and let me know what you'd like to see.

xoxo
Magg

Wednesday, July 29, 2015

Basic Smokey Eye Tutorial


Hey Guys!
I get a lot of requests to do tutorials on eye looks.. I wanted to get a better camera before I started doing them but I haven't yet so just bare with me and my low quality pictures! I promise I will do more tutorials once I get a better camera but for now this will have to do..

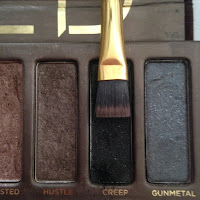
This is just a basic smokey eye look. I wanted to stick with using one palette so I used my Urban Decay Naked palette because I think it is pretty popular and if you don't have it the colors I used are easy to find and most people probably already have them in their collection.


First I primed my eyes with my primer potion from Urban Decay and then I applied Naked all over my lid up to my brow with a fluffy blending brush.. When doing looks like this I like to start with a base color all over my lid to cover up veins and just make a consistent base to work with.

Now I go in with Buck and apply it in my crease and on the outer corner of my eye using the same brush.

The next few steps I apply shadows right over where I put Buck and pretty much go a shade darker each time. Starting out light and going darker helps with blending, makes the shadows seamless and have no harsh lines, and if you start out dark but end up going too dark its hard to go back from there without removing all of your makeup. So next I apply Dark Horse in the crease and the outer corner of my eye, still using my blending brush.

So far this is what you should have..
 
Now I am using Creep and a more precise brush. This time I am keeping the color tighter in the crease and on the outer corner of my eye. I keep applying Creep until I get the darkness I want then I use my fluffy brush with no product on it and I just go back over everything and blend it out. You can keep doing this until you get the look you want.

Now that I have made a mess I use makeup remover cream and a Q-Tip to clean up my line..
 
Almost finished!
 
At this point if you want to add liner or a wing you can do that, I didn't this time. Now I am doing my lower lash line. First I apply Creep with a flat definer brush close to my lower lashes.
 
Then I using a pencil brush and Buck I smoke it out. Basically just going back and forth on the lash line and blending out Creep. You can skip this step and just use a black liner on your water line but I never leave my lower lash line blank, its just preference.
 
Last thing I do is add mascara and fill in my brows and I am done! This is the finished look.. I hope this helps and as usual if you have any question.. ASK! Side note.. If any of you got the new Urban Decay Smokey let me know what you think of it! Trying to decide if I need it or not!
xoxo
Magg


Saturday, July 25, 2015

My Makeup Routine- Eyebrow Edition!


Hey Guys!
This is a requested post on how I fill in my eyebrows. First I want to say I know it seems like there are a ton of steps in this but really once you do it yourself a few times you will get faster and faster at it, and I took a lot of pictures so there is a bunch of information here. Brows are my favorite part of doing my makeup because I think it really completes a look. I feel unfinished if I don't do something with them!


The product I used is the Bodyography Essential Brow Trio and the Brow Defining brush. Before I actually got a brow product I used a flat defining brush and the Buck color in my Urban Decay Naked pallet but you can use any matte color you think matches your brows.
 
First thing I do is brush all of my brow hairs up using the spooley end of my brush.

This part is different for everyone depending on your eyebrow shape.. I pick up some product on the angled brush side and I start from the inner corner of my brow and trace my arch the whole to the tail of my brow.
 
Using the spooley side again I brush all of the hairs down.
 
Then, I pick up more product with the angled brush and start from the top corner of my brow and again, trace my brow to the tail.
 
Back to the spooley side! I brush the hairs to the natural way they lay..
 
Basically what I just did was outline my brow.. The next step is to fill it in! I start from the bottom outer corner of my brow and brush up, basically following the way the hair grows.
 
I just work my way in, filling in empty spots and still following the natural growth pattern..
 
This is pretty much what you should have when you are done filling in.. pretty dark, huh? Don't worry we are blending next!
 
Back to the spooley to blend.. I really use this a lot in the front of my brow because I like this part to be lighter and the tail of my brow to be darker. So just brush it out in the way that the hair grows, for me I brush up..
 
Then I continue to brush out my brow the whole way to the tail just to blend in that product, still brushing the way the hair grows..
 
Now you are finished! If I am going out I will set my brows with a brow gel but you don't really need to on a day to day basis. Here is the difference! Like I said before filling in your brows really finishes off your look..


As always, if you need any help or have questions just ask! I hope this helps those of you having trouble or just trying this for the first time!
 
xoxo
Magg