Wednesday, July 29, 2015

Basic Smokey Eye Tutorial


Hey Guys!
I get a lot of requests to do tutorials on eye looks.. I wanted to get a better camera before I started doing them but I haven't yet so just bare with me and my low quality pictures! I promise I will do more tutorials once I get a better camera but for now this will have to do..

This is just a basic smokey eye look. I wanted to stick with using one palette so I used my Urban Decay Naked palette because I think it is pretty popular and if you don't have it the colors I used are easy to find and most people probably already have them in their collection.


First I primed my eyes with my primer potion from Urban Decay and then I applied Naked all over my lid up to my brow with a fluffy blending brush.. When doing looks like this I like to start with a base color all over my lid to cover up veins and just make a consistent base to work with.

Now I go in with Buck and apply it in my crease and on the outer corner of my eye using the same brush.

The next few steps I apply shadows right over where I put Buck and pretty much go a shade darker each time. Starting out light and going darker helps with blending, makes the shadows seamless and have no harsh lines, and if you start out dark but end up going too dark its hard to go back from there without removing all of your makeup. So next I apply Dark Horse in the crease and the outer corner of my eye, still using my blending brush.

So far this is what you should have..
 
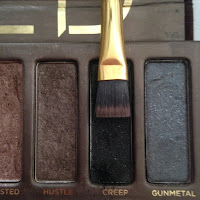
Now I am using Creep and a more precise brush. This time I am keeping the color tighter in the crease and on the outer corner of my eye. I keep applying Creep until I get the darkness I want then I use my fluffy brush with no product on it and I just go back over everything and blend it out. You can keep doing this until you get the look you want.

Now that I have made a mess I use makeup remover cream and a Q-Tip to clean up my line..
 
Almost finished!
 
At this point if you want to add liner or a wing you can do that, I didn't this time. Now I am doing my lower lash line. First I apply Creep with a flat definer brush close to my lower lashes.
 
Then I using a pencil brush and Buck I smoke it out. Basically just going back and forth on the lash line and blending out Creep. You can skip this step and just use a black liner on your water line but I never leave my lower lash line blank, its just preference.
 
Last thing I do is add mascara and fill in my brows and I am done! This is the finished look.. I hope this helps and as usual if you have any question.. ASK! Side note.. If any of you got the new Urban Decay Smokey let me know what you think of it! Trying to decide if I need it or not!
xoxo
Magg


Saturday, July 25, 2015

My Makeup Routine- Eyebrow Edition!


Hey Guys!
This is a requested post on how I fill in my eyebrows. First I want to say I know it seems like there are a ton of steps in this but really once you do it yourself a few times you will get faster and faster at it, and I took a lot of pictures so there is a bunch of information here. Brows are my favorite part of doing my makeup because I think it really completes a look. I feel unfinished if I don't do something with them!


The product I used is the Bodyography Essential Brow Trio and the Brow Defining brush. Before I actually got a brow product I used a flat defining brush and the Buck color in my Urban Decay Naked pallet but you can use any matte color you think matches your brows.
 
First thing I do is brush all of my brow hairs up using the spooley end of my brush.

This part is different for everyone depending on your eyebrow shape.. I pick up some product on the angled brush side and I start from the inner corner of my brow and trace my arch the whole to the tail of my brow.
 
Using the spooley side again I brush all of the hairs down.
 
Then, I pick up more product with the angled brush and start from the top corner of my brow and again, trace my brow to the tail.
 
Back to the spooley side! I brush the hairs to the natural way they lay..
 
Basically what I just did was outline my brow.. The next step is to fill it in! I start from the bottom outer corner of my brow and brush up, basically following the way the hair grows.
 
I just work my way in, filling in empty spots and still following the natural growth pattern..
 
This is pretty much what you should have when you are done filling in.. pretty dark, huh? Don't worry we are blending next!
 
Back to the spooley to blend.. I really use this a lot in the front of my brow because I like this part to be lighter and the tail of my brow to be darker. So just brush it out in the way that the hair grows, for me I brush up..
 
Then I continue to brush out my brow the whole way to the tail just to blend in that product, still brushing the way the hair grows..
 
Now you are finished! If I am going out I will set my brows with a brow gel but you don't really need to on a day to day basis. Here is the difference! Like I said before filling in your brows really finishes off your look..


As always, if you need any help or have questions just ask! I hope this helps those of you having trouble or just trying this for the first time!
 
xoxo
Magg

Tuesday, July 21, 2015

July 2015 Boxycharm


Hello loves!
I'm sorry I haven't posted anything in about a week.. I had a busy week and weekend! Last week during all the craziness I received my July Boxycharm and I wanted to share with you what came this month. Along with my 5 products I have a coupon code to share with you! It is for $20 off on www.gorgehair.com with CODE: BC20

First thing I have in my box is the OFRA Cosmetics Universal Eyebrow pencil. This is full size and retails for $13.00.. It is water resistant and made with a synthetic beeswax base for a smooth and soft application. I don't normally like wooden brow pencils or liners but I really like the color of it and it is super pigmented!  www.ofracosmetics.com
 

The next thing I am so excited about! It is the gorge I'll make you look amazing daily spray, this is a full size product and it retails for $29.95. The bottle says it is a magical leave in conditioning spray that will turn your hair into the sexiest hair ever.. it also says this product repairs damaged hair, instantly adds shine, detangles like no other, protects from heat, seals & protects hair color, prevents split ends, stops hair breakage, creates amazing silkiness, enhances natural body, and helps with flat irons. I have used this a few times and I must say I have seen a difference in my hair and it smells amazing (which is always a plus!) www.gorgehair.com
 
Next is the Vasanti Professional Blush Brush and it retails for $29.00.. I always love getting brushes because honestly you can never have enough! This brush is made with high-quality nylon fibers and it feels super soft. I don't like brushes this small for blush but I used it with my setting powder for under my eyes and it worked great so that's probably what I'll be using mine for. www.vasanticosmetics.com
 
The mascara that came in this box is another product I am rally excited about. I have already used it and I love it.. I think it is my new favorite because the formulation is so smooth and super dark and it makes my lashes look amazing! It is the MDMflow Greater Than Mascara, it is full size and retails for $35.00. (It is not available in the U.S. until the end of July) www.mdmflow.com
 
The last product that came in my box this month is the yourMinerals Transparent Veil Setting Powder, this is the medium full size and retails for $26.00. I only used this once but so far I really love it. It is a very fine powder an it is really nice for setting under eye concealer because it is very brightening, even when you swatch it you can tell it just brightens up your skin. This is a really nice product. www.yourminerals.com
 
 
That Is everything I received this month in my Boxycharm. The total value of the box is $132.95 and I only paid $21 for it all! This is for sure my favorite monthly subscription.. www.boxycharm.com

xoxo
Magg

Monday, July 13, 2015

My Favorite Hair Proucts! 2015


Hey Babes!
If you know me then you know I LOVE all things hair.. So why have I not put up a post yet about hair? Crazy.. I know. Well you guys loved my posts on my beauty favorites so I wanted to share with you my favorite hair products! Again these are all products I personally use and my honest opinion on them. Some products you can find at Walmart or a drug store and some products you have to buy at a hair salon or Ulta.

First product I want to mention is the Matrix VaVoom Freezing hair spray. This is my all time favorite hair spray.. this is what I used on all my clients when I worked in a salon and this is what I use personally now. I have used many different hair sprays but this one has always stood out to me. It just has amazing hold but doesn't make your hair look or feel super stiff.
 
Next up is the Suave Professionals Dry Shampoo.. this is just a basic dry shampoo but I really love it. It does everything a dry shampoo is supposed to do and I love the volume it gives me. For around $4 this is a steal.
 
This is the It's a 10 Miracle Leave-In spray and I use this every day that I wash my hair. After I towel dry my hair I just spray this in. Its an awesome product to keep your hair healthy.. this spray is deep conditioning and an excellent nourishing treatment. It also controls frizz, adds shine, and helps to smooth hair.
 
Up next is the Redken Real Control Daily Nourishing Cream. I have put my hair through so much in the past few years.. I cant believe I'm not bald! From bleaching, to coloring, and even a few perms.. basically my hair has been put through hell. This product has brought my hair back from the dead. When my hair is really bad I use it twice a week but when it is healthy I only use it once a week. After I shampoo, I ring my hair out and put this in, then I leave it for about 5 minuets before I rinse it out. Your hair will thank you for using this stuff! It's amazing!
 
 
This is the Big Sexy Hair Powder Play.. this is basically a root pump powder. After I dry my hair I sprinkle this on my crown and hair part (or where ever you want volume) then I tease my hair. It makes my hair look so full and beautiful and the powder has amazing hold power. I love this stuff!
 
Sticking with the Big Sexy Hair, this is the Big Sexy Hair Dirty Dry Wax. I used this more when my hair was shorter but I still love it with my hair long. It does pretty much what a regular wax would do but minus the mess. I used to style my hair then pray this through it for a messy look. Again the hold power is amazing.. Big Sexy Hair is a great brand with a ton of great products these are just my 2 favorite. 
 
So on my lazy days(which is most days) I like to give my hair a messy, wavey look. To get that I use the Suave Professionals Captivating Curl Mouse. This stuff is supper sticky and it keeps my waves looking good all day without them feeling stiff! I think Suave is stepping up their game with the new professional products they have come out with and they are all a really great price!
 
I cant believe I haven't talked about shampoo and conditioner yet! My all time favorite duo is the Tigi Bed Head Color Goddess shampoo and conditioner. First thing I love about this stuff is that it smells AMAZING. For real.. they need to make a candle. Second thing I love is that it is a great product. It does an amazing job at making my color last and I love the way it makes my hair feel. It's good stuff. Get it in your life asap..
I wanted to include a shampoo and conditioner that you can get at a drug store and I would have to say my favorite duo would be TRESemme Keratin Smooth shampoo and conditioner. This makes my hair feel awesome and it just an all around good shampoo and conditioner. It is a salon quality product for a drug store price.
 
Last but not least I wanted to include my extensions because I get so many questions on them. I buy them at Sally's and they are the Design Lengths Remy 18'' extensions. They are human hair so you can wash, curl, straighten, perm, cut and color these like your own natural hair. They come in 10 pieces and they just clip in. I have used extensions for years so its easy for me to use them but if you never have used them before it takes a few times to get comfortable and for you to learn how to blend them well. If my hair is dark I just buy the color espresso, but if I have red hair or a lighter brown I buy blonde ones and color them to match my hair. These are awesome and I recommend them to everyone!

I hope you enjoyed reading and of course if you have any questions please ask! I'm thinking of doing a post on how I style my hair using most of these products so if that's something you'd like to see let me know!

xoxo
Magg